Setting up the Hikvision Cameras
I initially setup the Hikvision cameras using the web browser interface. Generally it wasn't too difficult but then I am an retired IT Manager so I am used to networks. There are several Youtube videos that describe the process of setting up the cameras but I thought it might be useful to explain how I sorted out some of the problems that I encountered.
Finding the cameras on your network
 In order to set up your cameras you will need to find their IP addresses on your network. Most home routers use DHCP (Dynamic Host Configuration Protocol) this where your router will assign a dynamic IP address to each devices on your network. When you plug in your IP camera the default configuration is DHCP and so the camera gets its IP address from your router. To find the IP addresses of your IP cameras there are several programs available to download that can look at your network and show you which devices are connected and what there IP addresses are. The one I quite like as it has a very nice interface is Fing. Fing was originally just an app for your phone but it is now available as a desktop version.
Once you have installed it it will check your connectivity to the internet and scan your network. If you click on 'Connectivity' in the blue menu bar on the left of the window. In the next screen under 'Local network' click on 'Scan for devices'. This should scan your local network and give you a list of all the connected devices. If you click on any of the devices it will give you more detail on that device (you can even customise the details with your own names and icons). You can then work out which device is your IP camera and get its IP address. Once you have the IP address you can put that into a browser where you normally type in a sites url. This should then bring up the IP camera's browser interface. if you are setting it up for the first time then it will ask you to set a admin password.
NTP servers connection failure
If you are having connection failure issues when setting the NTP servers, try checking what the default gateway address is set to. By default it is set to 192.168.1.1, however you will need to check what your gateway address is on your router. The default gateway address on my BT homehub is 192.168.1.254. Once this was set correctly the time server test connected OK.

Setting Daylight Saving Time
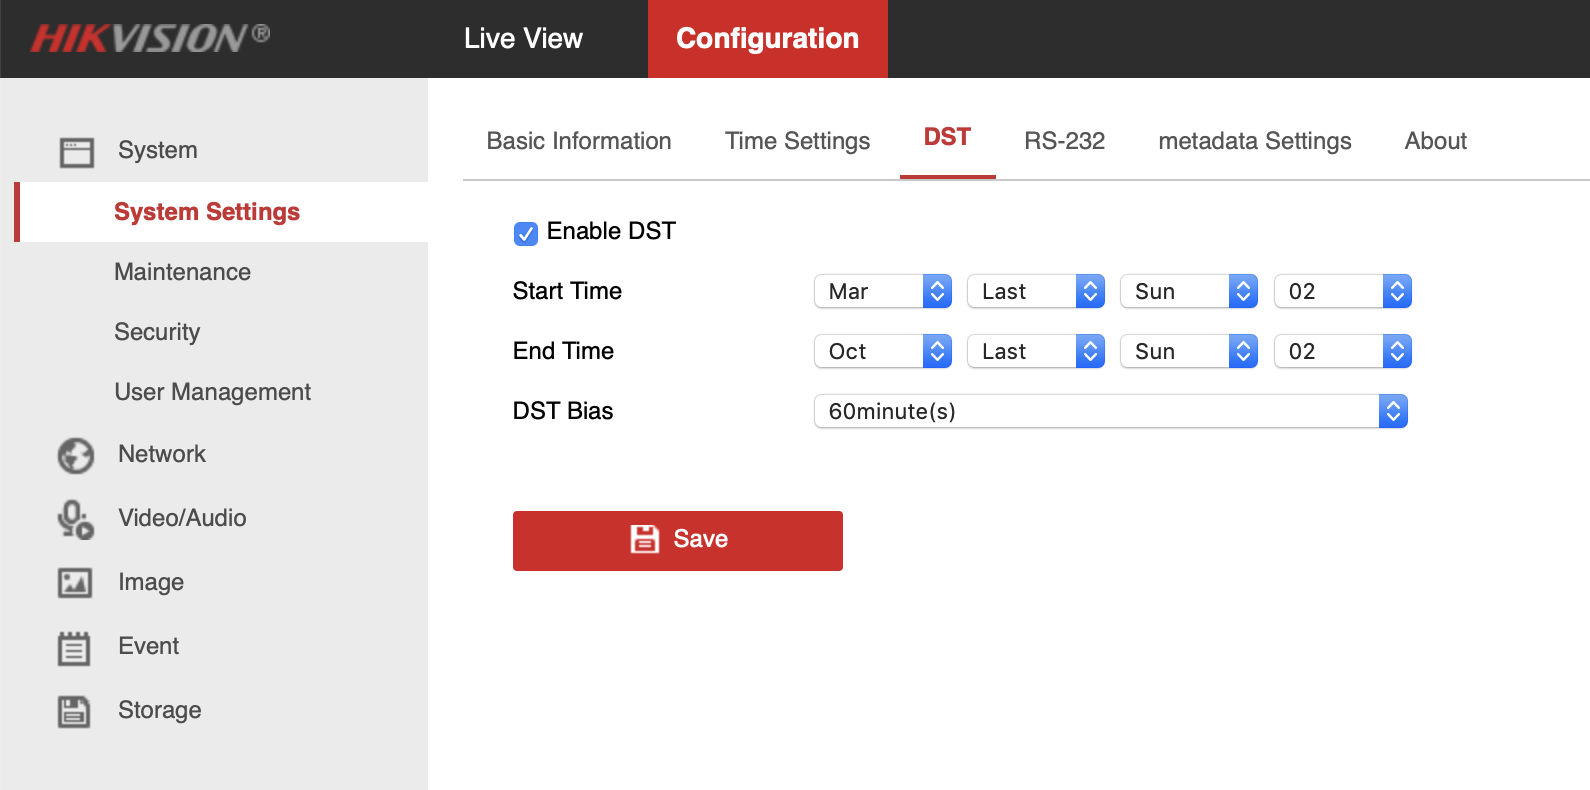
You need to make sure that when the clocks change for British Summer Time that you cameras change their times. You can do this by enabling DST in the configuration area of the web interface. You will need to set the start and end times, in the UK it is the last Sunday in March and the last Sunday in October and you will need to set the DST Bias to 60minute(s) for UK British Summer Time.
Sound
 Not all the Hikvision cameras come with a built in microphone. The reason for this is that essentially most of the IP cameras are for outdoor use. If you add a microphone you need a hole to capture the sound and this would lead to the ingress of water into the unit and this wouldn't be good for the electronics. However most of the Hikvision cameras do come with the ability to add a microphone. If the model number of your Hikvision camera includes an 'S' then it is capable of adding a microphone. The connections are via a flying lead off the main cable and it is marked 'Audio' and has 4 screw in wire connectors.
One of our cameras came with a built in microphone, which was inside the cover. Although it did work it did muffle the sound and wasn't as good as the external microphones.
The only problem with adding a microphone is that you will need a 12v power source to give it power. You used to able to get passive microphones that didn't need a separate power supply but they don't seem to be available anymore. With our Hedgehog feeding station and our Hedgehog nest box we didn't need to add a separate power supply as we had one already installed. For the bird nest box and the swift nest boxes we had to add in a cable for the 12v power supply. You will need to think about this when you plan your network and the sighting of the cameras.
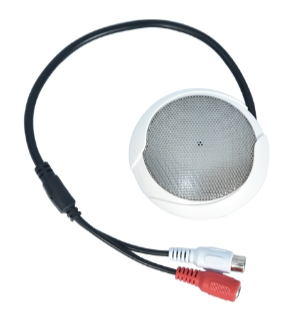
The microphone that I used has three connectors on it, a red female connector for the 12 power supply, a white female phono connector for the audio and a black male power connector which you can use as a power through for the 12v power supply.
It is not too difficult to wire the microphone in. You will need a small phono connector, a small length of wire, wire strippers, a small watch makers screwdriver and a small Phillips screwdriver. I have done a short video below which shows you just how easy it is to do.
Sound settings
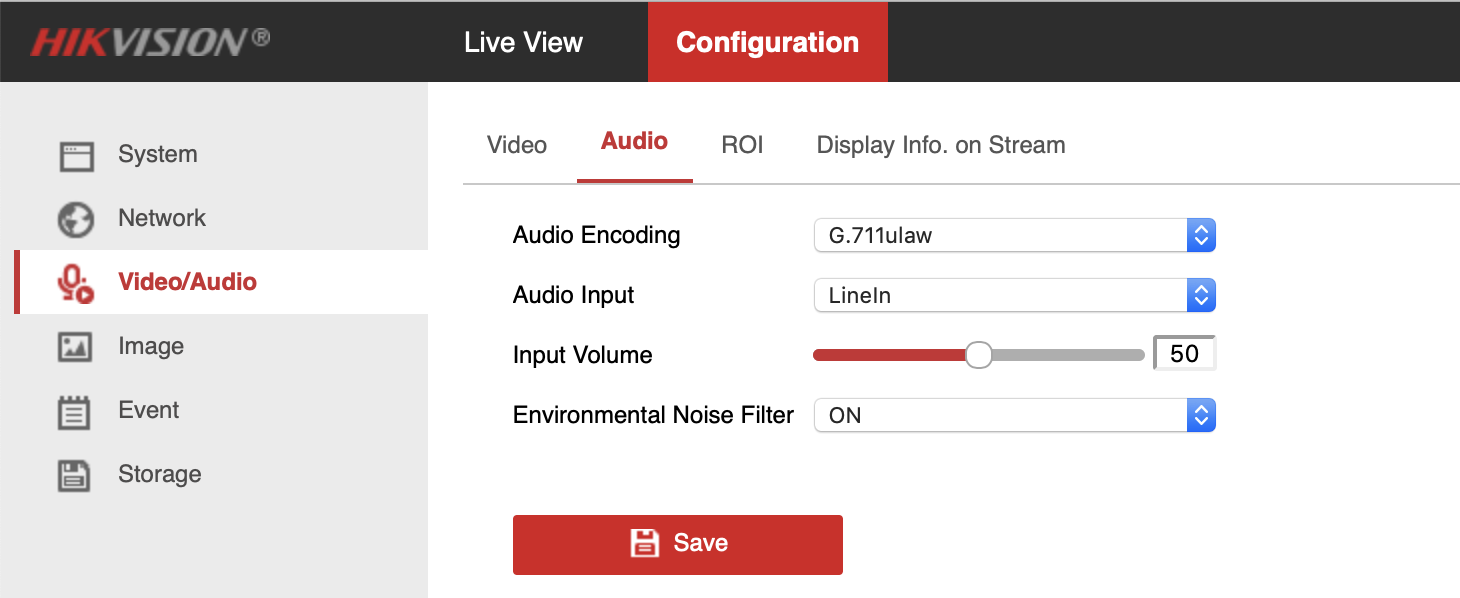
Once you have added your microphone there are a few settings that you need to set. In the web browser interface click on Configuration and then the video/Audio tab on the left navigation. You need to set the Video Type to 'Video&Audio'.

Then click on ' Audio' in this section and change the 'Audio Input' to 'LineIn'. I would suggest that you turn on the 'Environmental Noise Filter' as this gives a clearer sound.